Standalone SWT download is now an Eclipse project
For developers of standalone SWT applications, the SWT component is available as a separate download. For Eclipse 3.1, the SWT download can now be easily imported into your workspace as a project.
- Download SWT for standalone applications. A standalone version of SWT is available on the same download page as the Eclipse SDK. Look for the section titled SWT Binary and Source. Do not extract the archive file, just save it to disk.
- Select Import... from the File menu.
- Select Existing Projects into Workspace and click on the Next button.
- Select Select archive file: and use the Browse button to locate the SWT standalone archive you have previously downloaded.
- Click on the Finish button.
The org.eclipse.swt project you have imported defines the location of the native libraries so you can run your application with the standard Java or JUnit launchers.
Starting SWT standalone applications using PDE
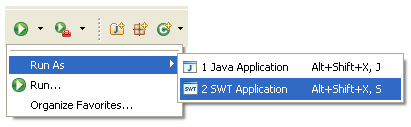
To run and debug your SWT application using the SWT plug-in from Eclipse, you can use the new SWT application launcher to locate the native libraries. A shortcut to the launcher is available in the context menu of your Java class via Run As > SWT Application.
Advanced graphics
New API has been added for advanced graphics operations such as path for curves and lines, alpha blending and transformations. This new API requires the Cairo Vector engine on GTK and Motif, and GDI+ on Windows.
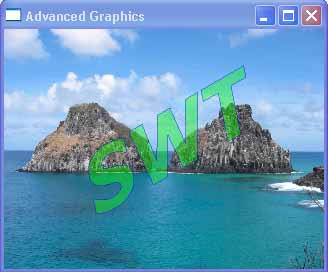
For more details see the example snippet.
New Link widget
The new Link
widget displays text containing hyperlinks.
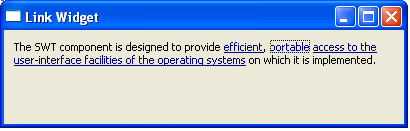
For more details, see the example snippet.
Strike through and underline in StyledText
Text can be underlined or
a strike can be drawn through it with the new StyleRange.underline
and StyleRange.strikeout fields.
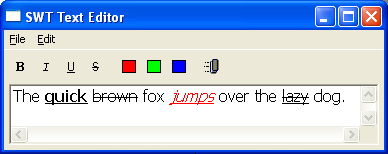
For more details see the example snippet.
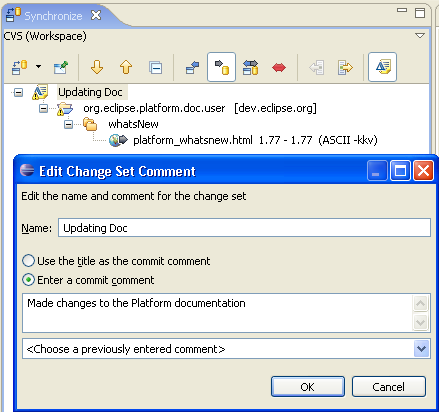
CVS outgoing change sets
 in the
Synchronize View, then select an outgoing change and choose Add To
> New Change Set... from the context menu. You can also appoint
a change set as the default and have all subsequent outgoing changes added
to that set automatically. Commands on the context menu allow outgoing
changes to be moved between change sets. When the change set is committed
to the CVS repository, the comment associated with the change set is used
as the CVS commit comment.
in the
Synchronize View, then select an outgoing change and choose Add To
> New Change Set... from the context menu. You can also appoint
a change set as the default and have all subsequent outgoing changes added
to that set automatically. Commands on the context menu allow outgoing
changes to be moved between change sets. When the change set is committed
to the CVS repository, the comment associated with the change set is used
as the CVS commit comment.
CVS commit review
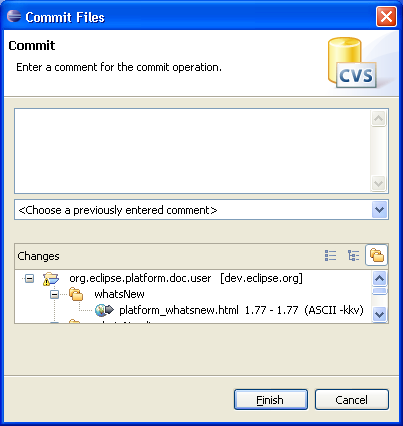
There are also CVS preferences (Team > CVS) for determining whether commit comments are mandatory and for specifying the maximum number of files that should be displayed when committing.
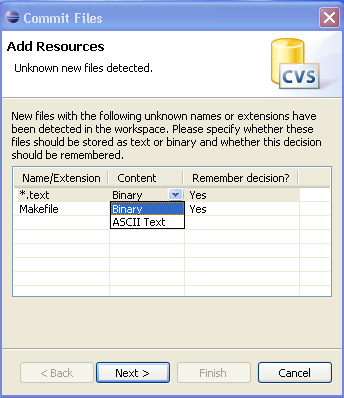
CVS improved file type support
CVS branch and merge
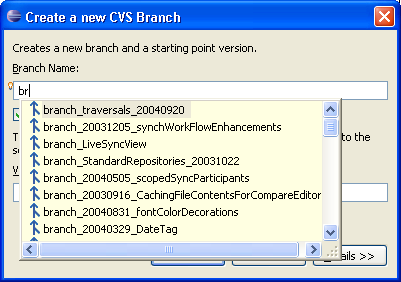
When merging you can simply specify the end tag and the wizard will automatically find the appropriate start tag. If a start tag is not available, you can still merge without seeing a preview in the Synchronize view.
Ant debugger

- System: Ant properties set from the System for the the build
- User: properties such as those set using the -D option
- Runtime: all properties set during the execution of the build
Ant editor improvements
- Support for folding of build file regions. Hovering over a folded Ant element lets you peek at the hidden code. You can quickly control folding presentation of a buildfile from the editor ruler menu (see screenshot below).
- Renaming occurrences of properties and targets within the same buildfile. To activate this use the editor context menu or the Alt+Shift+R keyboard shortcut when the cursor is located within the occurrence to rename.
- Navigating to the referenced target or property via Navigate > Open declaration (F3).
- Opening a browser on the relevant page in the Ant manual by placing your cursor on the name of an Ant task, type, etc. and pressing Shift+F2.

Ant target per build kind
The Targets tab for an Ant builder allows you to specify the target(s) that should be executed for each build kind. This includes the target to execute when you invoke a "Clean".

New features for the Console
- In the Console view you can signal end-of-file to a program waiting for input by pressing Ctrl+Z on Windows (Ctrl+D on Linux).
- You can configure the console to display output using a character encoding different from the default using the Console Encoding settings on the Common tab of a launch configuration.
- Your program's output can now be captured in a file in addition to being written to the console. The behavior is controlled by settings found on the Common tab of launch configurations.
- If you find you need to see multiple consoles at once, you can now open additional Console views via the New Console View command found on the Open Console drop-down menu in the Console view.