RAP with OSGior
RWT Standalonesetup, see
Application Configuration.
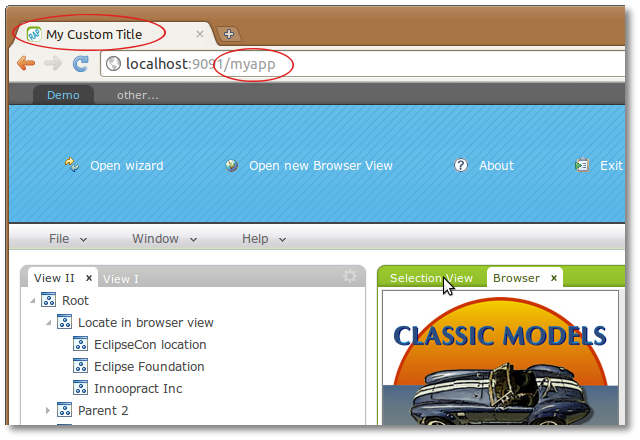
With the help of RAP's branding features you're able to define several (visual) aspects of your RAP application. This includes for example the page title which is shown in the browser or the theme to be used for the application.
You can define a new branding by creating an extension for the
org.eclipse.rap.ui.branding
extension point.
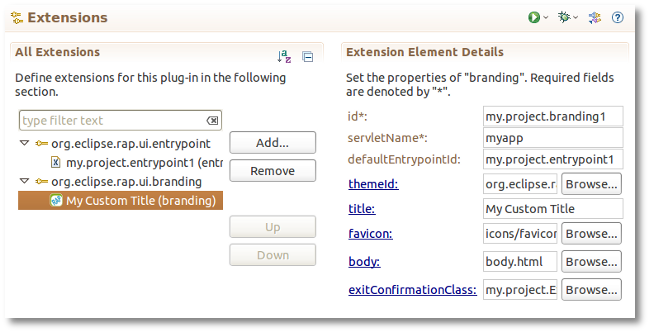
And here the same as it appears in the plugin.xml:
  <extension
      point="org.eclipse.rap.ui.branding">
    <branding
        id="my.project.branding1"
        servletName="myapp"
        title="My Custom Title"
        favicon="icons/favicon.png"
        body="body.html"
        defaultEntrypointId="my.project.entrypoint1"
        themeId="org.eclipse.rap.design.example.fancy.theme"
        exitConfirmationClass="my.project.ExitConfirmationImpl">
    </branding>
  </extension>
The servletName attribute defines the URL path to the application.
The application will be available at
http://host[:port]/[contextName/]servletName.
The contextName is optional.
In a deployment, this will be the webapp path.
You can also specify a context path in the RAP launcher.
The id of the entrypoint that should be started by default for this branding.
For example, with the example configuration shown above, the following URLs are equivalent:
http://host[:port]/myapp
http://host[:port]/myapp?startup=foo
given that the parameter of the entrypoint my.project.entrypoint1
is foo.
The id of the theme to be used for this branding.
The theme must be defined by an extension of org.eclipse.rap.ui.themes.
Without this parameter, the RAP default theme will be used.
See also RWT Theming.
To define the title which will be shown in the browser title or the the title of
the browser tab, you can use the title attribute.
The favicon is a 16x16 pixel square icon shown in the browser's address bar or tab. To be compatible with legacy browsers, use a file in the ICO format.
An optional file containing an HTML snippet to be included in the RAP index page.
This snippet will be included in the body element of the generated index page.
Please note that the preferred way of styling the application background is to add a theming
for the Display background property.
An optional class that implements the interface IExitConfirmation.
Implementations of this interface can control the exit confirmation that is shown whenever
the user tries to close the browser window or tab or navigates to another URL.
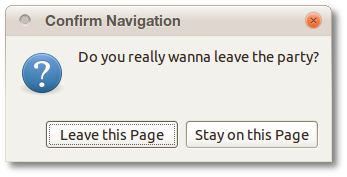
NOTE: Note that this is feature is not supported by every browser. Furthermore, some browsers may show additional text in the confirmation dialog.
An optional sub-element of a branding extension, that allows to add
<meta> or <link> tags
to the <head> of the generated index page.
Here's an example:
  <additionalHeaders>
    <meta name="author" content="Arthur Dent">
    </meta>
  </additionalHeaders>
Available tags are <meta> and <link>.
You can add more additional attributes to each tag with the attribute element.
This is an optional sub-element that allows to limit the available entrypoints of a branding.
Without this element, all entrypoints are available in every branding.
When the element <associatedEntrypoints> is specified, only the included
entrypoints are available for this branding.
Here's an example: imagine you have the following entrypoints defined:
Using different brandings, you can now group them so that customer A and administration A have the same branding (page title, servletName, theme, etc.) and are not allowed to access the applications for customer B. A sample implementation of the branding for customer A could look like this:
  <branding
      id="my.project.brandingA"
      ... >
    <associatedEntrypoints>
        <entrypoint id="my.project.customerA">
        </entrypoint>
        <entrypoint id="my.project.administrationA">
        </entrypoint>
    </associatedEntrypoints>
The same would be done for Customer B (with different entrypoint ids).