Select the folder JanesFolder in the Navigator view.
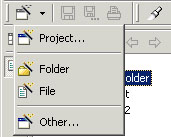
In the Workbench window's toolbar, activate the drop-down menu on the New Wizard button ![]() and select File. To activate the drop-down menu simply click on the down arrow.
and select File. To activate the drop-down menu simply click on the down arrow.
In the New File wizard, your folder's name and path already appear by default in the Enter or select the folder field. This is because you chose to create the new file while this folder was selected in the Navigator view and the view was active.
In the File name field, type a unique name for a new text file, including the .txt file extension. Do not use spaces or special characters in this file name (e.g., "JanesFile.txt").
Click Finish when you are done.
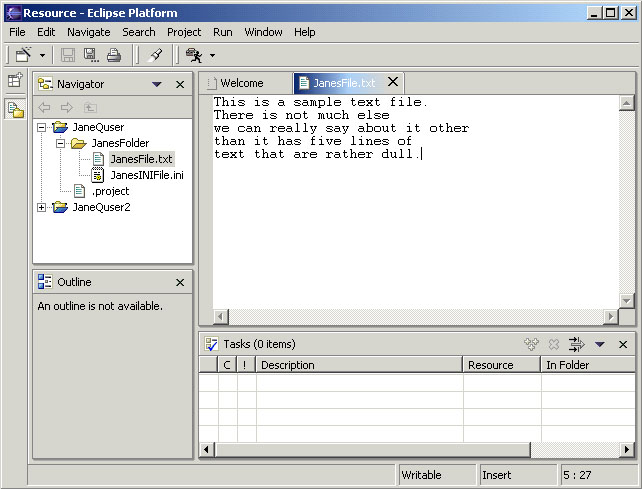
The Workbench has an editor capable of editing text files. A text editor is automatically opened on the newly created file.
In the text editor, type in the following five lines:
This is a sample text file.
There is not much else
we can really say about it other
than it has five lines of
text that are rather dull.
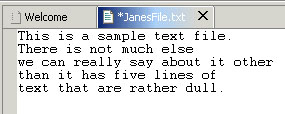
Notice that the editor tab has an asterisk (*) at the left of the filename. The asterisk indicates that the editor has unsaved changes.
In the Workbench window's toolbar, click the Save button ![]() to save
your work.
to save
your work.
In the Navigator view ensure your folder is still selected and the Navigator view is active.
Click the New Wizard button in the Workbench toolbar. Previously we clicked on the drop-down arrow of the New button. Here we clicked on the button itself which has the same effect as choosing File > New > Other...
In the New wizard, click Simple in the left pane, and in the right pane, click File. Then click Next.
In the File name field, type a unique name for an .ini file. Do not use any spaces or special characters in the file name (e.g., "JanesINIFile.ini"). Click Finish when you are done.
Since the Workbench does not have any editors registered for .ini files, it may launch an external editor on the file if one is registered with the operating system. For the moment, close the editor.