Managing Project Using Autoconf Support
The following is a tutorial that shows how to use the CDT support for the GNU autoconf and automake tools to manage a newly created C/C++ project. We will use a simple project - HelloAutoconf - in this tutorial as the focus is to explain the various feature that CDT provides.
1- Creating C++ Project "HelloAutoconf"
- The first step is to successfully create a new cpp project and set its name to be "HelloAutoconf" and set its location to be the default location.
- Create a subdir which will include the source file(s) for your C++ Program:
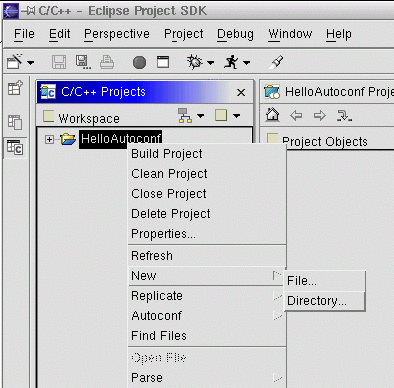
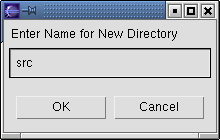
- From the C/C++ project view, RMC (right mouse click) the project and select "New -> Directory"
- Enter the name of the directory "src" and press OK
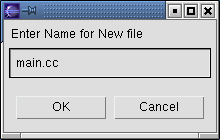
- Create a new cpp file by RMC the source directory that you have created and select New - > File, then enter the file name to be "main.cc"

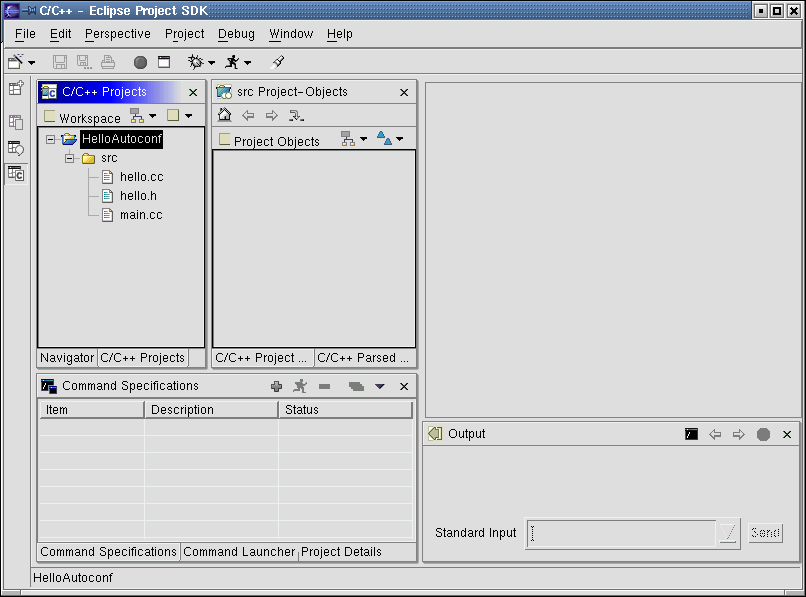
- Now we need to write main.cc:
- You can simply copy and paste the following code
to your file in the Eclipse workspace or type the following:
- Also, we need to write the following hello.cc and hello.h files
main.cc
#ifdef HAVE_CONFIG_H
#include <config.h>
#endif
#include "hello.h"
main()
{
CHello helloAutoconf;
helloAutoconf.display();
}
hello.cc
#include "hello.h"
void CHello::display()
{
//Hello World
std::string strHello;
strHello = "Hello World! \n";
std::cout << strHello;
}
hello.h
#include <iostream>
#include <string>
class CHello
{
public:
void display();
};
In order to use automake and autoconf to generate and run the configure script, certain files has to exist first. The CDT creates and maintains these file on your behalf. Two types of these files are maintained by the CDT tools, the configure.in and makefile.am. For each project there is only one configure.in and one or more Makefile.am's. Let us learn how to use the CDT tool to generate and maintain these files:
- From the C/C++ project view, RMC the HelloAutoconf project (top level directory) and select Autoconf -> Configure.
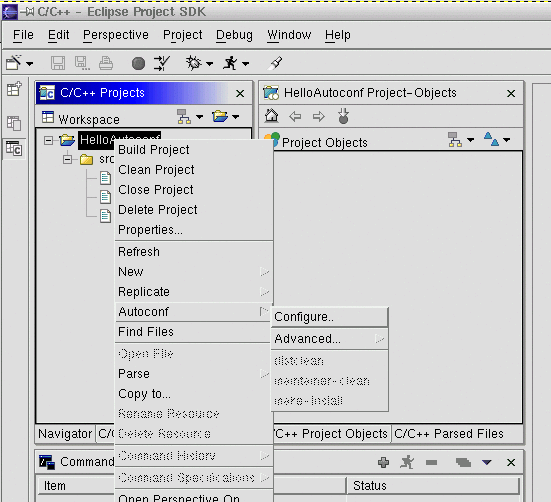
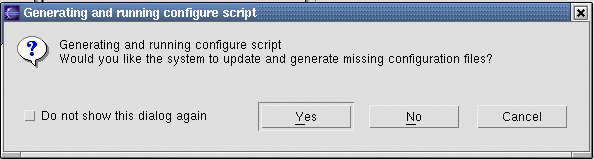
- Click the Yes button in the message dialog.
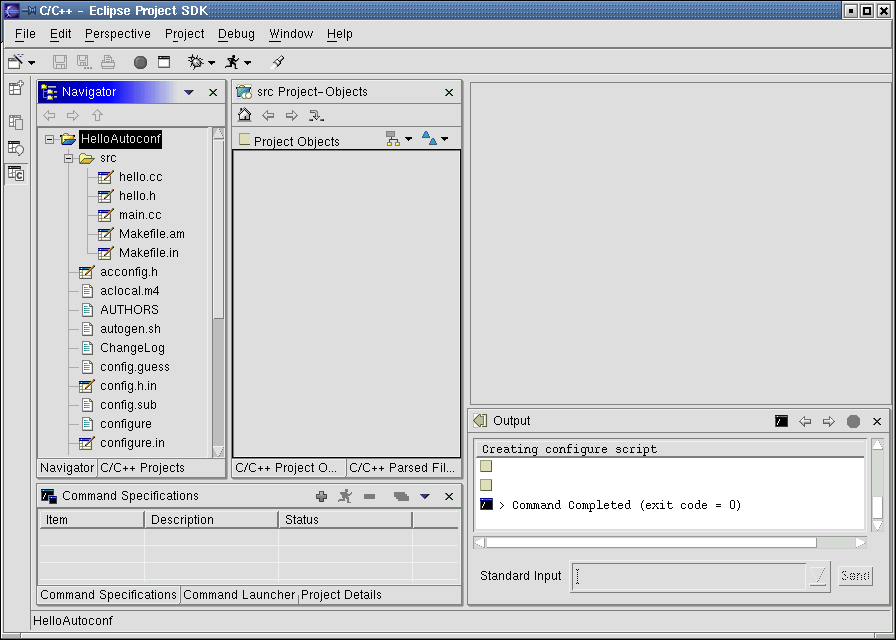
- Make sure that the command has completed successfully - you can monitor the command output from the output view , then examine your project directory. You should see all the files that automake and autoconf have created to generate the configure script together with the configure script. This is one good reason as to why it is a good practice to leave the top level directory for the autoconf and automake generated files. Also, you should see a Makefile has been created in each directory/subdirectory.
- Following the previous steps, the system will assign the name of your project to be your package name - if you want to check it out, examine the configure.in and check the input to the AM_INIT_AUTOMAKE macro. Later on, we will learn how to change these values.
- Also, by default, the system will set the program name to be the same as the name of your source directory - Later on, we will learn how to change these values.
- For now let us use the system default values and later on we will see how we can modify these values and regenerate the configuration files and create the configure script.
3- Building and Running HelloAutoconf Program
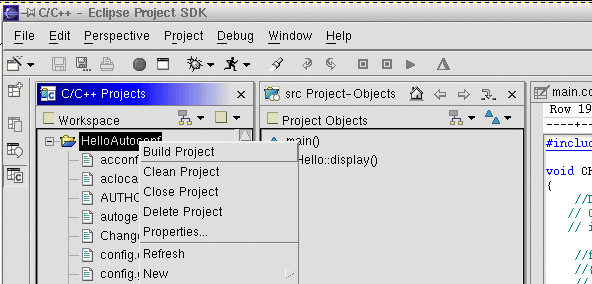
- From the C/C++ project view RMC the HelloAutoconf project and select Build Project
- After successful completion, check the source directory and make sure that the "src" target has been created - we will change the target name later.
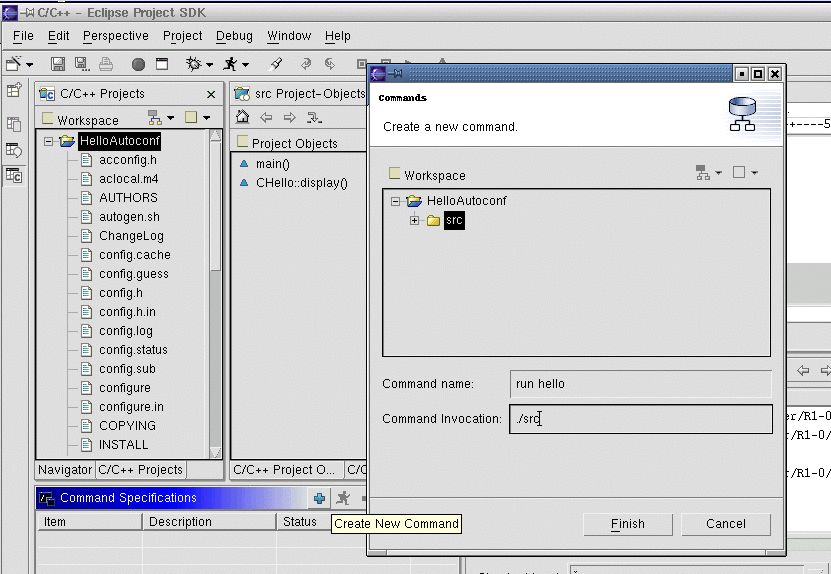
- From Command specification view, create a new command - Make sure that the command container being the "src" directory, enter the name of the command to be "run HelloAutoconf" and the invocation to be "./src"
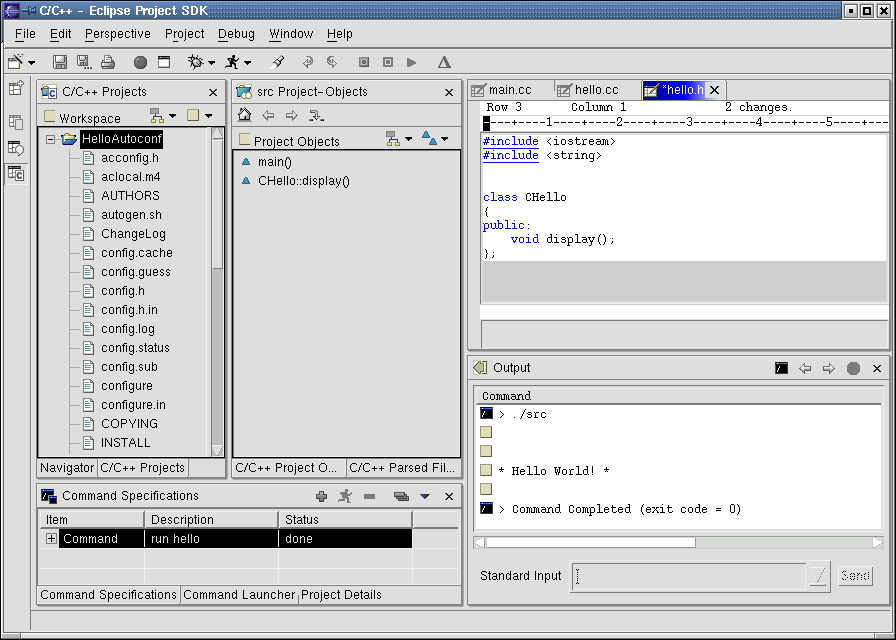
- From the command Specification view, RMC the command and select execute - you can use the view's local tool bar as well.
- Once the command has been finished, you should see Hello World! in the output view
4- Modifying and Updating Configuration Files (configure.in
and Makefile.am)
- There are many scenarios in which you will need to make some modifications
and updates to your configuration files, below is some of these scenarios.
The scenarios are selected to show the capabilities that the CDT provide
in supporting the GNU automake and autoconf.
- Modifying the value for the _PROGRAMS variables (Makefile.am)
- We will continue with our example that we have created earlier. As you might already noticed, the name of the target was set to be "src" - the name of the source file directory . When the system tries to set a value for the bin_PROGRAMS variable, which exists in the /HelloAutoconf/src/Makefile.am, it sets the variable's value to be the name of its parent directory. Now, if you want to change the program name, you may either change the name of the directory to be your target name and regenerate the configuration files and you are all set, or ,in the case that you would like to keep your directory name as it is, you can edit the Makefile.am and set the target name to be whatever value you want to use.
- For now, all the updates to Makefile.am's will be done manually by direct editing of the file. In future releases, the CDT tool will facilitate the way to update configuration file.
- Open HelloAutoconf/src/Makefile.am and change the value for the following variables:
- Set the bin_PROGRAMS variable to be equal to "hello"
- change all the other values of all the variables that are related to the target name as well. The following are the variables that need to be changed:
- Save the changes to the Makefile.am and now you need to regenerate the configure script
- RMC the hello project (top level directory) and select Autoconf -> Configure
-
Click yes on the message dialog box and make sure that the command has
completed successfully
- After executing the run configure command successfully, RMC the hello project and select build Project to build the new target
- You should now find that the hello target has been created under the source directory
- In order to run hello target, you can reuse the command that you have created in the command specifications view. By editing the invocation field and change the entry field to be "./hello" instead of "./src" and then execute the command either from the local tool bar and select the Execute command icon or by RMC the target and select Execute command action from the context menu.
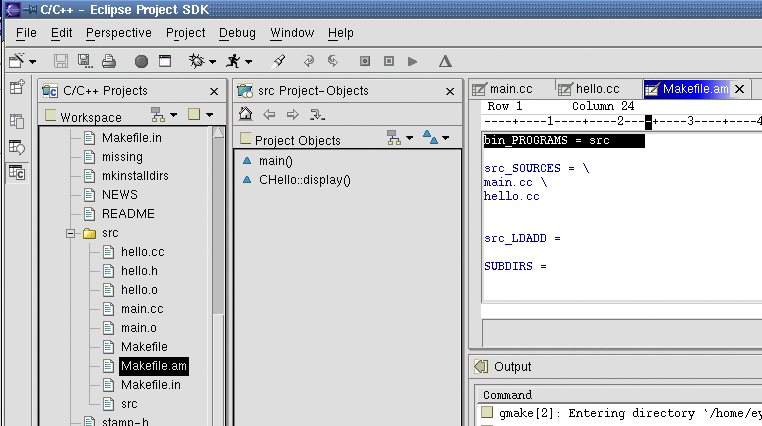
*_SOURCES, *_LDADD, and *_LDFLAGS, to be hello_SOURCES, hello_LDADD, hello_LDFLAGS
- Expanding HelloAutoconf Project
- Create a new sub directory and set the name to be "decorations."
- Create the following two files. frame.cc and frame.h.
- Also, modify main.cc to include the following code - added code is in red
- Once this is done, we have to update our configuration files - the configure.in and the Makefile.am - and also we need to generate a Makefile.am in the new directory that we have just created and added frame.cc and frame.h. We will let the tool does this for us and here what you need to do:
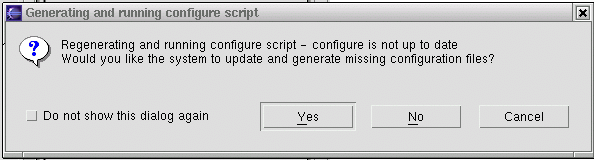
- RMC the project and select Autoconf -> Generate configure. You would notice that the Generate configure action is now enabled as changes were made to the configuration files and configure now is not up to date
-
Click Yes if prompted by the message pop up dialog as you want the
tool to update and generate you configuration files
- Once the command is completed successfully, RMC on the project and select Autoconf -> Run configure.
- Then RMC the project and select Build Project - you can use the main tool bar icons instead
- After a successful build, switch to the Command specification view and select the Run command - you don't need to create a new one as you have already done that before
- RMC the command and select execute
- You should now see the changes that we have added to our HulloAutoconf program displayed in the output view
- Modifying libraries names
- Suppose that you want to change the name of your static library that we have just created in the previous section. Currently, it has the name of libdecorations.a
- Edit HelloAutoconf/src/decorations/Makefile.am and change the value of the noinst_LIBRARIES to become libframes.a
- Also, change the libdecorations_a_SOURCES to be libframes_a_SOURCES and leave the value of the variable as it is
- Save the Makefile.am file
- Now, select the parent directory of the Makefile.am file. RMC and select Autoconf -> Generate configure
- Click on the Yes button if the pop up message dialog is showing.
- After a successful completion of the command, examine the HelloAutoconf/src/Makefile.am. You should see now that the new library name "./decorations/libframes.a" has been used in the value of the hello_LDADD variable instead.
- Build the executable and run the program and it should run as expected.
Let us now expand our sample HelloAutoconf project to include source
files in a sub directories of the "src" directory. As the project
now has several levels of sub folders, it is called a deep projects.
The tool is designed - this the default option - to allow the user to build
code in sub directories into temporary non-installing libraries. This library
will be linked to the code by the make program.
- frame.cc
#include "frame.h"
- int CFrame::getSize()
{
return 16;
}
frame.h
- class CFrame
{
public:
int getSize();
};
main.cc
#include "hello.h"
void CHello::display()
{
//Decorations:
CFrame frame;
int frameSize = frame.getSize();
for(int i = 0; i <frameSize;
i++)
{
std::cout
<< "*";
}
std::cout << "\n";
//Helloworld:
std::string strHello;
strHello = "* Hello
World! *\n";
std::cout << strHello;
for(int i = 0; i <frameSize;
i++)
{
std::cout
<< "*";
}
std::cout << "\n";
}
Managing Imported Project with Existing Configuration
Files
When importing a project with existing configuration files - configure.in and Makefile.am,- Autoconf support through the CDT tool can help you with the following tasks:
- Running the configure script - see the section "Running the generated configure script" in this tutorial for more information
- Installing the package, provided you have the right permissions to do so - by clicking the make install action from the Autoconf menu
- Updating configuration files is very limited and depends on the type of the project and how it is organized - this will be enhanced in new CDT releases. If you are an experienced autoconf and automake user, then check the documentation to see what types of Makefile.am and variables can the tool helps you with.